FAQ
Windows one-click setup for all clients (recommended, with changelog) 
最新版 4.1 客户端,修正了多个BUG,支持更多协议,连接更稳定,速度更流程,有效保护数据免受篡改与窥探。

Changelog:
2014年12月11日 1.07版 对外公布,之前我们内部测试多次,多个版本,所以首个对外的版本是1.07
2014年12月18日 1.08版 修正了最小化窗体后,会自动弹出窗口的问题。
2015年01月07日 1.09版 修正更新域名后不能使用的问题。
2015年02月11日 2.0.0.0版,增加了N多功能
解决了部分杀毒软件报病毒的问题,是因为压缩的问题,现在已经不压缩。
增加了更换DNS的功能
增加了永久路由功能
增加了添加路由和删除路由时显示百分比
测速时重新加载服务器列表
增加了恢复hosts文件的功能,部分用户因为修改了这个文件,造成部分网站不能访问
生成支持文件(方便我们的帮部分用户分析问题)
优化了部分操作逻辑,比如点击退出时提示是否清空路由,是否最小化,是否断开VPN等问题。
2015年02月15日 2.0.0.1
修复程序退出的时候,右下角的状态栏图标没有消失的问题,鼠标要放一下会自动消失,现在这个问题已经修复。
修复程序启动的时候,如果没有网络出错的问题,现在已经提示正常
win8启动的时候不再自动使用修复sstp功能,只在需要的时候在工具菜单那里运行下
2015年04月29日 2.0.0.2
修复了xp系统下,如果本地网卡是使用自定义DNS,使用我们的工具里设置google dns等后还原后会丢失原来的dns配置的问题。
增强了性能,现在不同的服务器,不同的类型都使用独立的拨号链接,互不影响,解决了以前如果前一个vpn断不开,后面一个不能拨号的问题,(以前是必须重启机器才能恢复)。
2015年09月18日 2.0.0.3
修复深圳部分小运营商运行时,初始化的问题。
增加PPTP是否加密的选项。
在设置工具里增加快速打开“网络连接”。
在没有拨号的情况下退出软件提示“退出会断开VPN" 的提示的逻辑问题。
2015年09月23日 2.0.0.4
断开和连上时在线人数自动加减1,解决断线后需要重新运行程序的问题。
2015年12月23日 2.0.0.5
修复多个连接数时,有时候判断超过连接数错误bug。
针对国内DNS环境不稳定的情况,优化了部分地区有时候 初始化 问题,现在更加稳定。
取消自动创建的拨号链接功能,现在用户的VPN连接里不会出现我们程序里自动配置的VPN连接。
除了L2TP协议外,360不再提示需要修改pbk文件。
2015年12月26日 2.0.0.6
修复L2TP协议时,重新启动时无法拨号的bug。
修复PPTP加密重新启动时无法记忆的问题。
2016年1月6日 2.0.0.7
修复在测速列表双击服务器选择不了的bug。
windows10需要禁用掉IPV6,才能解决DNS污染的问题.
2016年2月24日 2.0.0.8
修复windows10用户l2tp不能使用的问题.
增强部分网络情况下初始化失败的问题,增强了更多网络环境下的可用性.
windows10用户拨号的时候提示修复禁用IPv6.
修复生成技术支持文件的bug,同时把这个按钮放在登陆页面,确保没有登陆时也能生成技术支持文件.
修复部分网络下断开连接不生效的问题,提示已经断开,事实上没有断开,造成多个连接重拨.
修复不停的点击断开按钮,在线数会减少的bug,事实上不会真减少.
2017.4.20 3.0
完全重新架构的新版本,使用C++重新开发,更加高效
新增加:
直接支持openvpn
多语言系统中不再乱码(但还都显示是简体中文)
全新界面
增加和删除国内路由更快了,可以瞬间完成,以前需要很久的百分比,且增加过程中占用cpu比较高。
连接更多稳定可靠,旧版本在某些环境中l2tp,ikev2不能稳定使用,需要重启机器才行。
更多网络环境中可以用,以前的版本中可能会出现“登陆失败”,新版本已经对这种情况做了更多兼容处理。
2017.4.21 3.1 3.2
修复iKev2模式下,默认网关没有设置的bug
更改点击X为隐藏窗体,更熟悉国人的操作习惯,如果要退出,请在右下角托盘那里,右键退出。
3.2 修复下载配置文件不能更新的bug
2025.7.28 日 4.0
全新架构
2025.8.8 日 4.1
修复了界面还有一些链接问题
What if the new app does not run on Windows 7 or Windows 8?
The latest official 5UF VPN app for Windows is built and tested for newer Windows releases. On Windows 7 and Windows 8, which are largely out of mainstream support, you may see install failures, startup issues, or connection problems. We cannot guarantee the same experience as the new app on those systems in the near term.
If you must stay on an old Windows version, consider one of the following:
- Upgrade Windows to a supported release your hardware can run (for example Windows 10 or 11), then install the latest official app; or
- Use a legacy Windows build of our client where still supported (feature and security updates may lag; follow site or support guidance); or
- Use Super VPN (browser extension) for browser-based access; or
- Use a third-party VPN client with manual setup: How to use a third-party app with 5UF VPN on Windows (tutorial).
Whenever possible, we still recommend a supported OS + latest official app for the best stability and security.
How to Clear Cache Issues (Windows)
-
Close 5UF VPN completely
-
Make sure the application is fully exited.
-
Check the system tray and Task Manager to ensure no 5UF VPN processes are running.
-
-
Navigate to the cache folder
-
Open File Explorer and go to:
C:/Users/user/AppData/Roaming/com.top.wuf
-
Important: Replace user with your own Windows username, as that folder represents your account.
-
-
Delete all files inside this folder
-
Select all files and folders inside com.top.wuf and delete them.
-
This clears any cached data that may be causing issues.
-
-
Restart 5UF VPN with administrator rights
-
Right-click the 5UF VPN icon and choose Run as administrator.
-
This ensures the app can rebuild its cache properly and avoids permission issues.
-
✅ After this process, 5UF VPN should start fresh, without old cached data causing errors or slowdowns.
What to do if the Windows 5UF app cannot start or has cache issues
If the Windows version of 5UF APP does not respond, crashes, gets stuck, or fails to open, the cause is often damaged local cache data.
Recommended steps:
- Fully exit 5UF VPN and make sure no tray icon remains.
- Open
C:/Users/YourWindowsUsername/AppData/Roaming/com.top.wuf. - Delete the cached files in the
com.top.wuffolder. - Restart the computer.
- Right-click 5UF VPN and choose Run as Administrator.
If it still cannot start, contact support and provide your Windows version, device model, screenshot of the error, and the time when it happened.
If you are still using an older client, we recommend switching to the latest 5UF VPN app for better stability and compatibility.
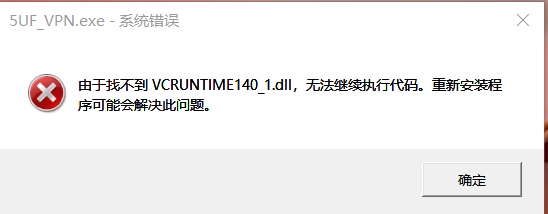
How to fix the missing VCRUNTIME140_1.dll error (for 5UF VPN)
If 5UF VPN reports VCRUNTIME140_1.dll is missing, install the official Microsoft Visual C++ Redistributable below. Do not download DLL files from unofficial sites.
❗️Encountering This Error? Follow These Steps to Fix It
If you see the error message below, don’t worry. Simply follow the steps provided to resolve the issue quickly and easily.
✅ Step 1: Go to the Official Microsoft Download Page
? Visit this official link:
? https://learn.microsoft.com/zh-cn/cpp/windows/latest-supported-vc-redist?view=msvc-170
This page contains the latest supported Visual C++ Redistributable installers.
✅ Step 2: Download the Correct File for Your Device
Scroll down to the section:
“Visual C++ Redistributable v14"
Then download the version(s) based on your system:
| Your Device Type | File to Download | Description |
|---|---|---|
| ?️ 64-bit Windows | vc_redist.x64.exe | For most modern systems; includes x64 and ARM64 binaries |
| ? 32-bit Windows | vc_redist.x86.exe | Needed for older systems or some 32-bit apps |
✅ Tip: If you're not sure, install both files to ensure full compatibility.
✅ Step 3: Install the Redistributables
-
Run each.exefile you downloaded
-
Follow the installation prompts
-
Restart your computer once finished
✅ Step 4: Launch 5UF VPN Again
After restarting:
-
Double-click to launch the 5UF VPN client
-
The app should now start normally without any DLL errors
❌ Important Warning
Do not download DLL files from third-party websites — they may contain malware or be outdated.
Always use the official Microsoft source linked above.
How to open 5UF VPN automatically at login (Windows)
Windows Setup Instructions for 5UF VPN Auto-Launch
Follow the steps below to configure 5UF VPN to start automatically when you log into your Windows account:
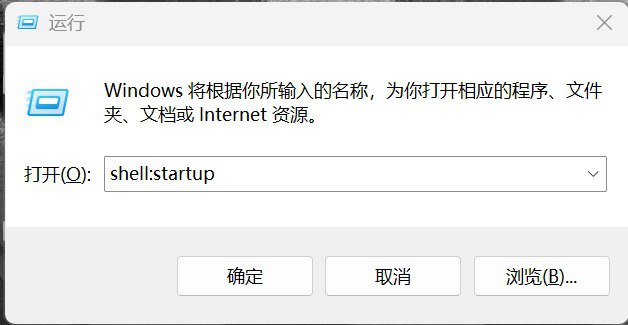
Step 1: Open the Run Dialog
Press the Windows + R keys simultaneously to open the Run dialog box.
Step 2: Access the Startup Folder
Type the following command into the Run box and press Enter:
shell:startup
This will open the Startup folder where programs that launch at login are stored.
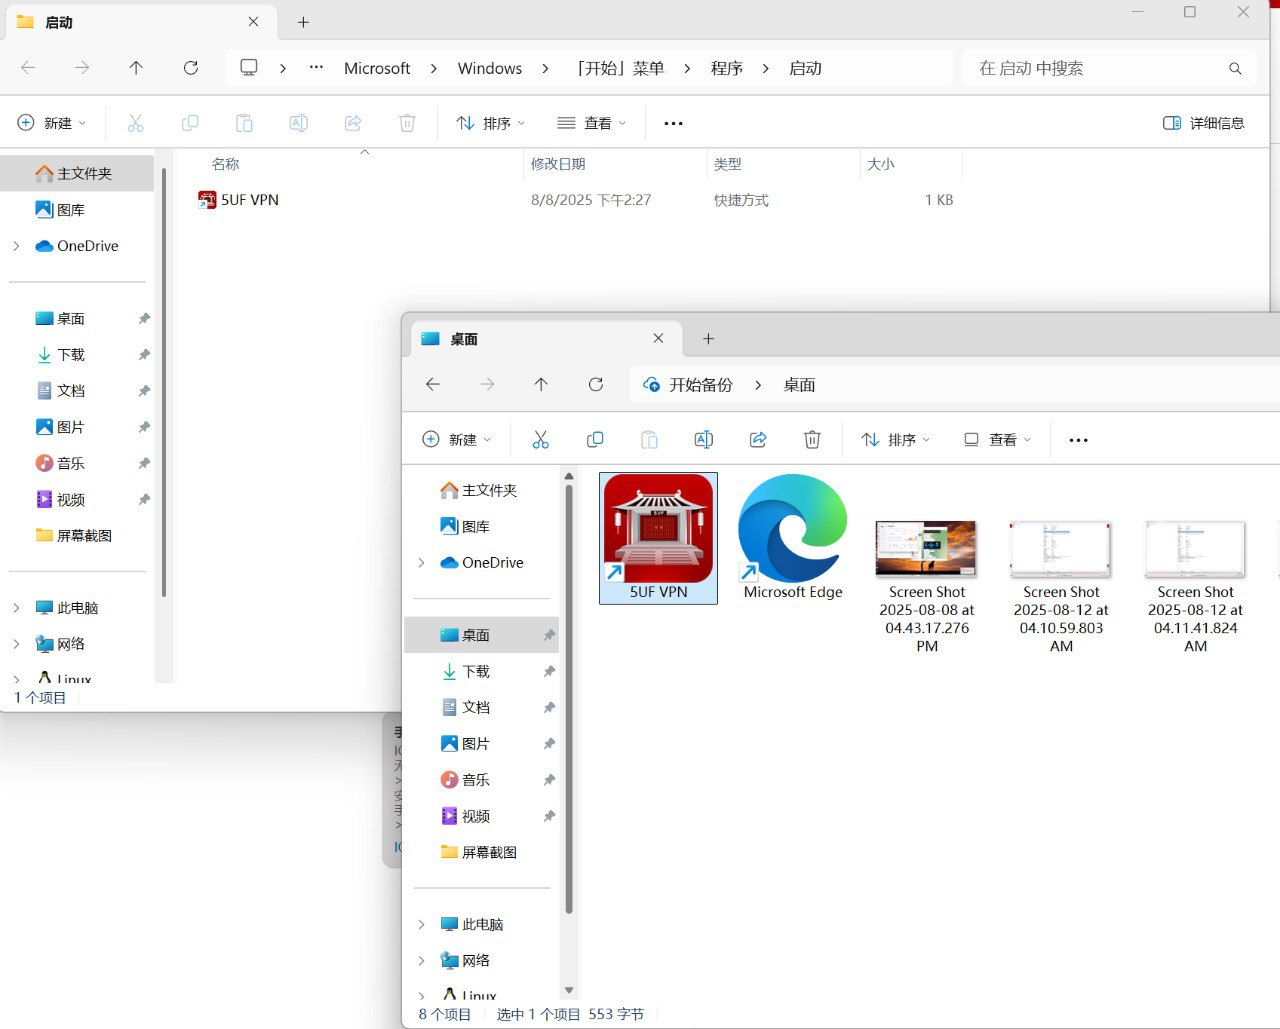
Step 3: Add 5UF VPN to Startup
Locate the 5UF VPN application executable or its shortcut on your computer.
Drag and drop the 5UF VPN shortcut into the Startup folder window. This action ensures the app will automatically launch every time you sign in.
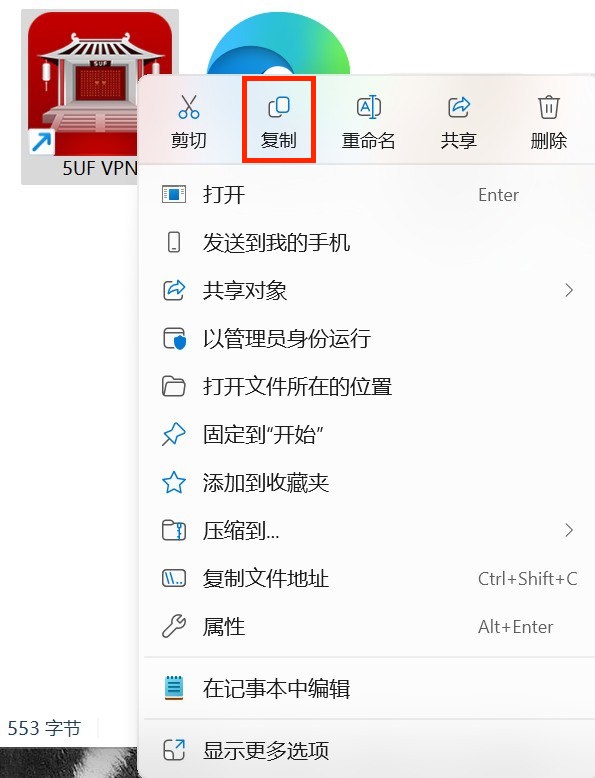
Additional Tips:
-
If you do not have a shortcut, right-click the 5UF VPN.exe file and select Create shortcut before moving it to the Startup folder.
-
To remove the app from startup, simply delete the shortcut from this folder.
How to confirm your Windows processor
Step 1: Verify Your Processor Architecture
For Windows Users
-
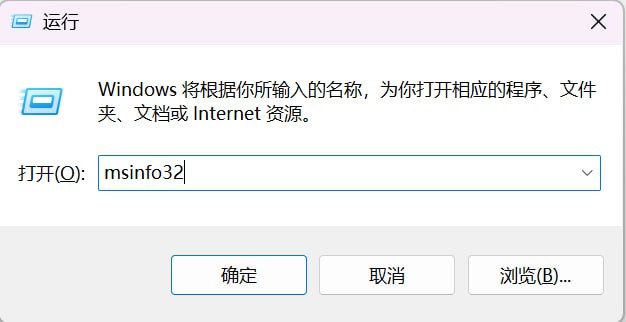
Open System Information
Press Windows + R, type msinfo32, and hit Enter.
-
Check System Type
-
If System Type shows “x64-based PC”, your processor supports AMD64 (x86-64) and is compatible with the standard Windows AMD64 version.
-
If System Type shows “ARM-based PC”, your device runs on an ARM processor and supports Windows ARM64.

Step 2: Access the Download Page
Open System Information
Press Windows + R, type msinfo32, and hit Enter.
Check System Type
If System Type shows “x64-based PC”, your processor supports AMD64 (x86-64) and is compatible with the standard Windows AMD64 version.
If System Type shows “ARM-based PC”, your device runs on an ARM processor and supports Windows ARM64.
Visit: https://www.5ufclub.com/news/vpn/id/11168/
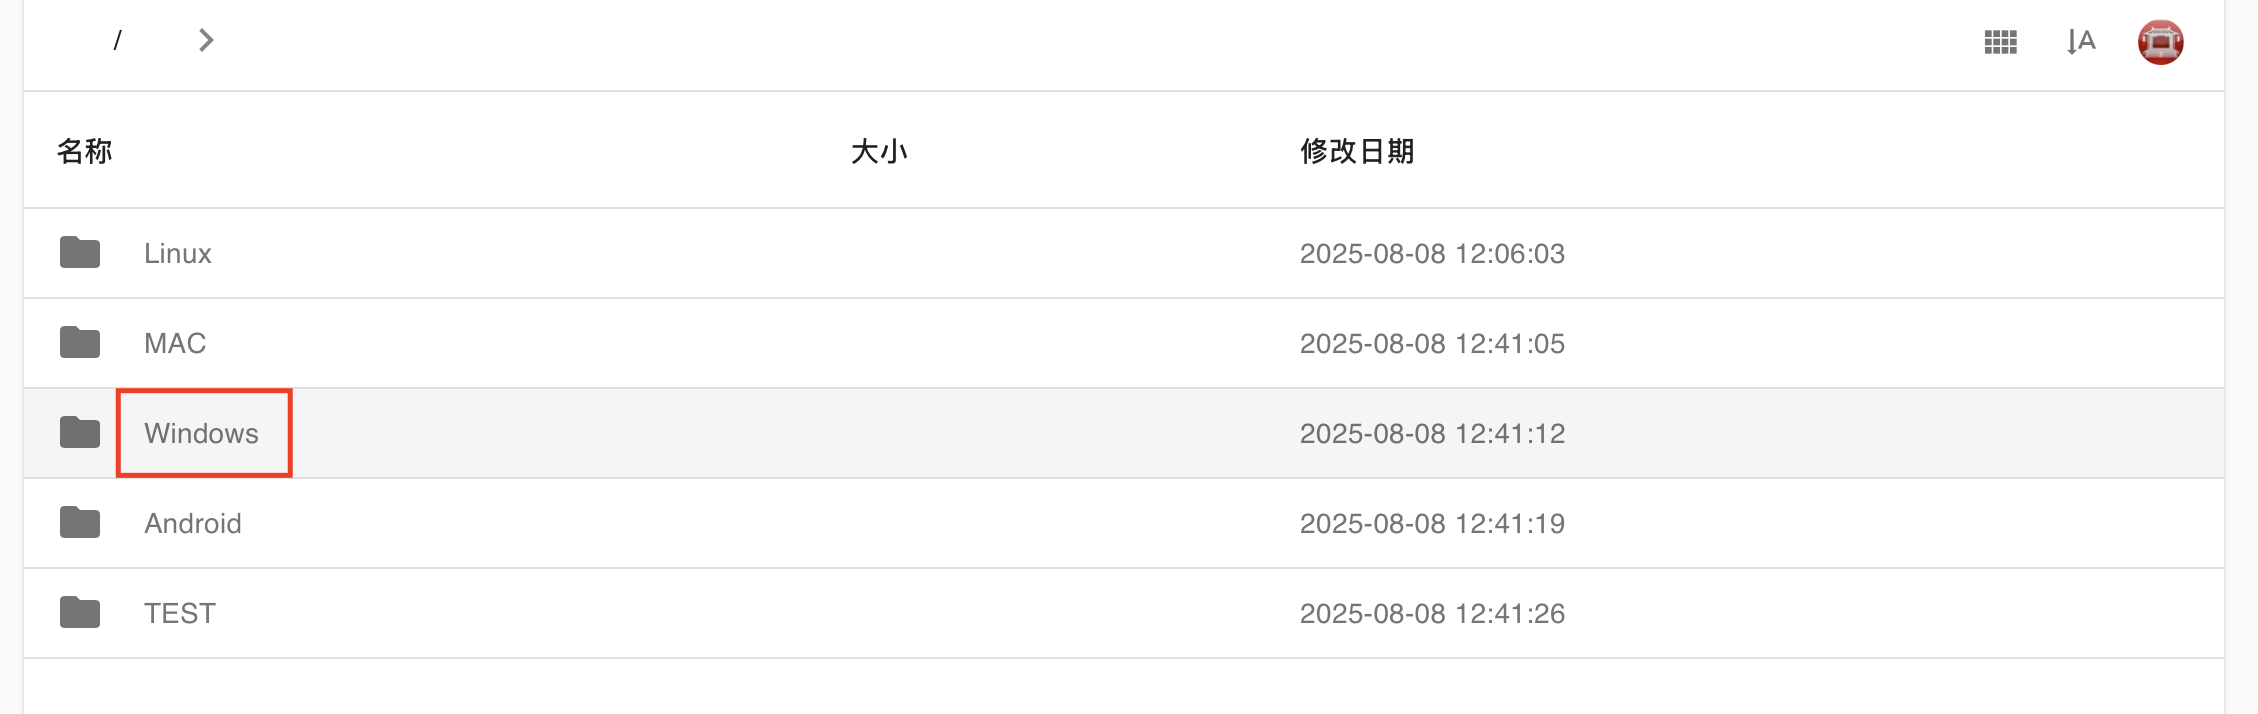
Step 3: Select Your Platform
On the website, select Windows from the list of platforms.
Step 4: Download the Correct Version
-
For x64-based PCs, download the AMD64 version.
-
For ARM-based PCs, download the ARM64 version.

How to use Trojan (XRay) with windows
1. 下载客户端并安装
Clash for Windows
https://dl.clashforwindows.org/releases/latest/Clash.for.Windows.Setup.0.20.39.exe
更多其它端也可以在这里找:
https://dl.clashforwindows.org/releases/latest/
备用下载点:
Clash.for.Windows.Setup.0.20.39.exe
2. 点击导入
从我们的网站上获取订阅地址
https://www.5ufclub.com/xray_config
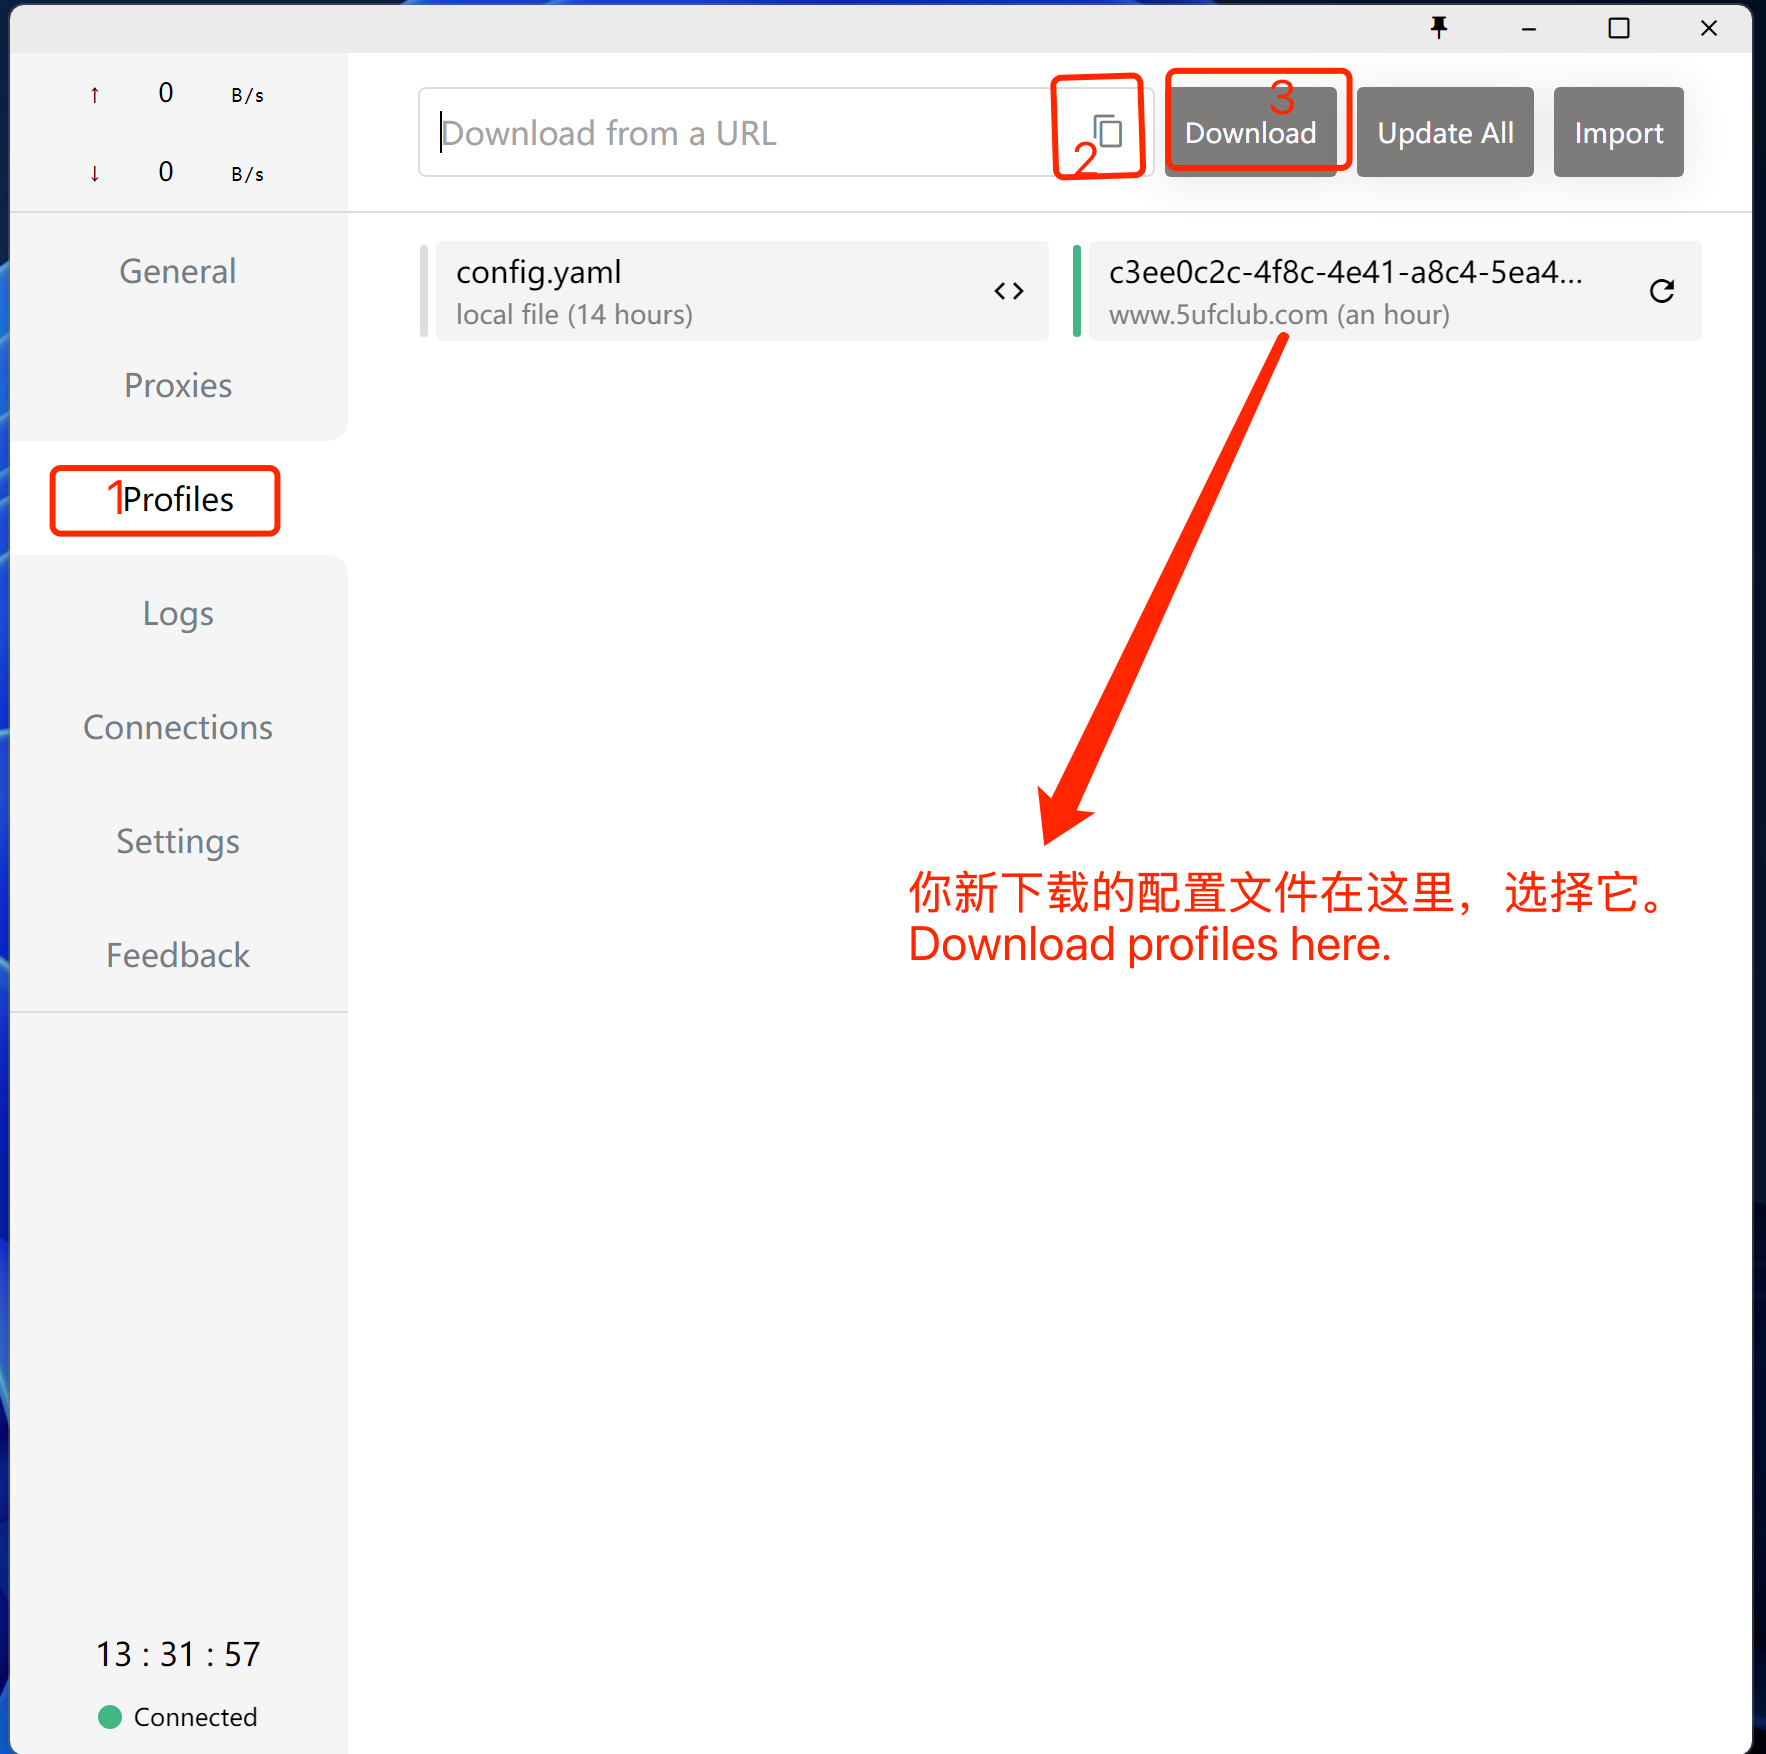
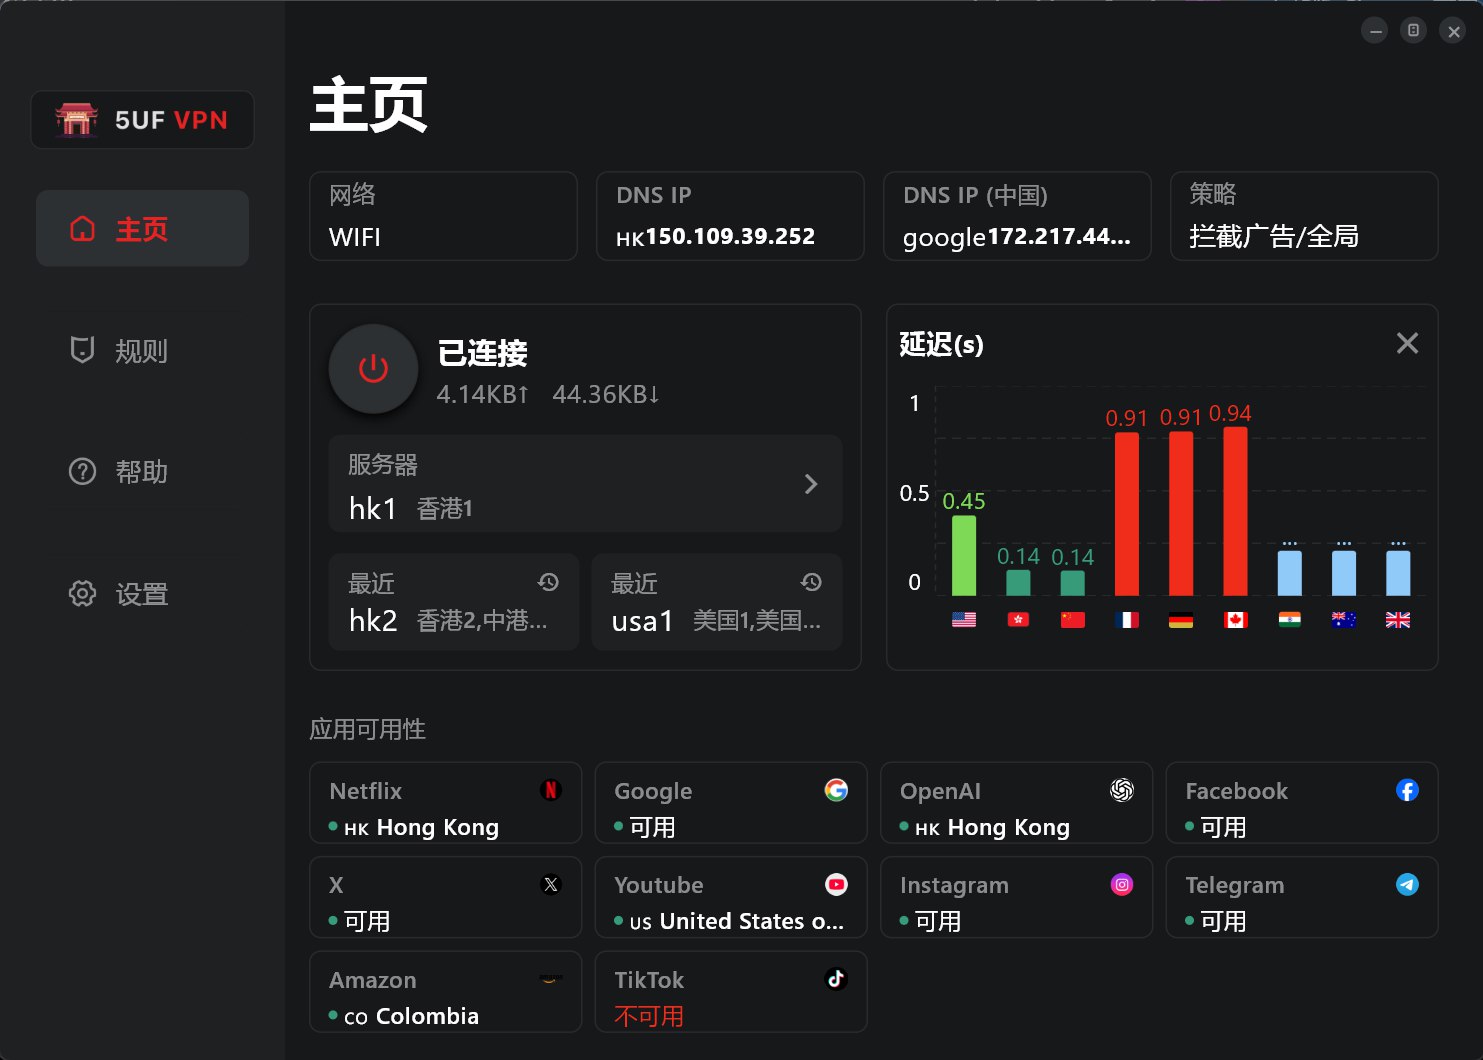
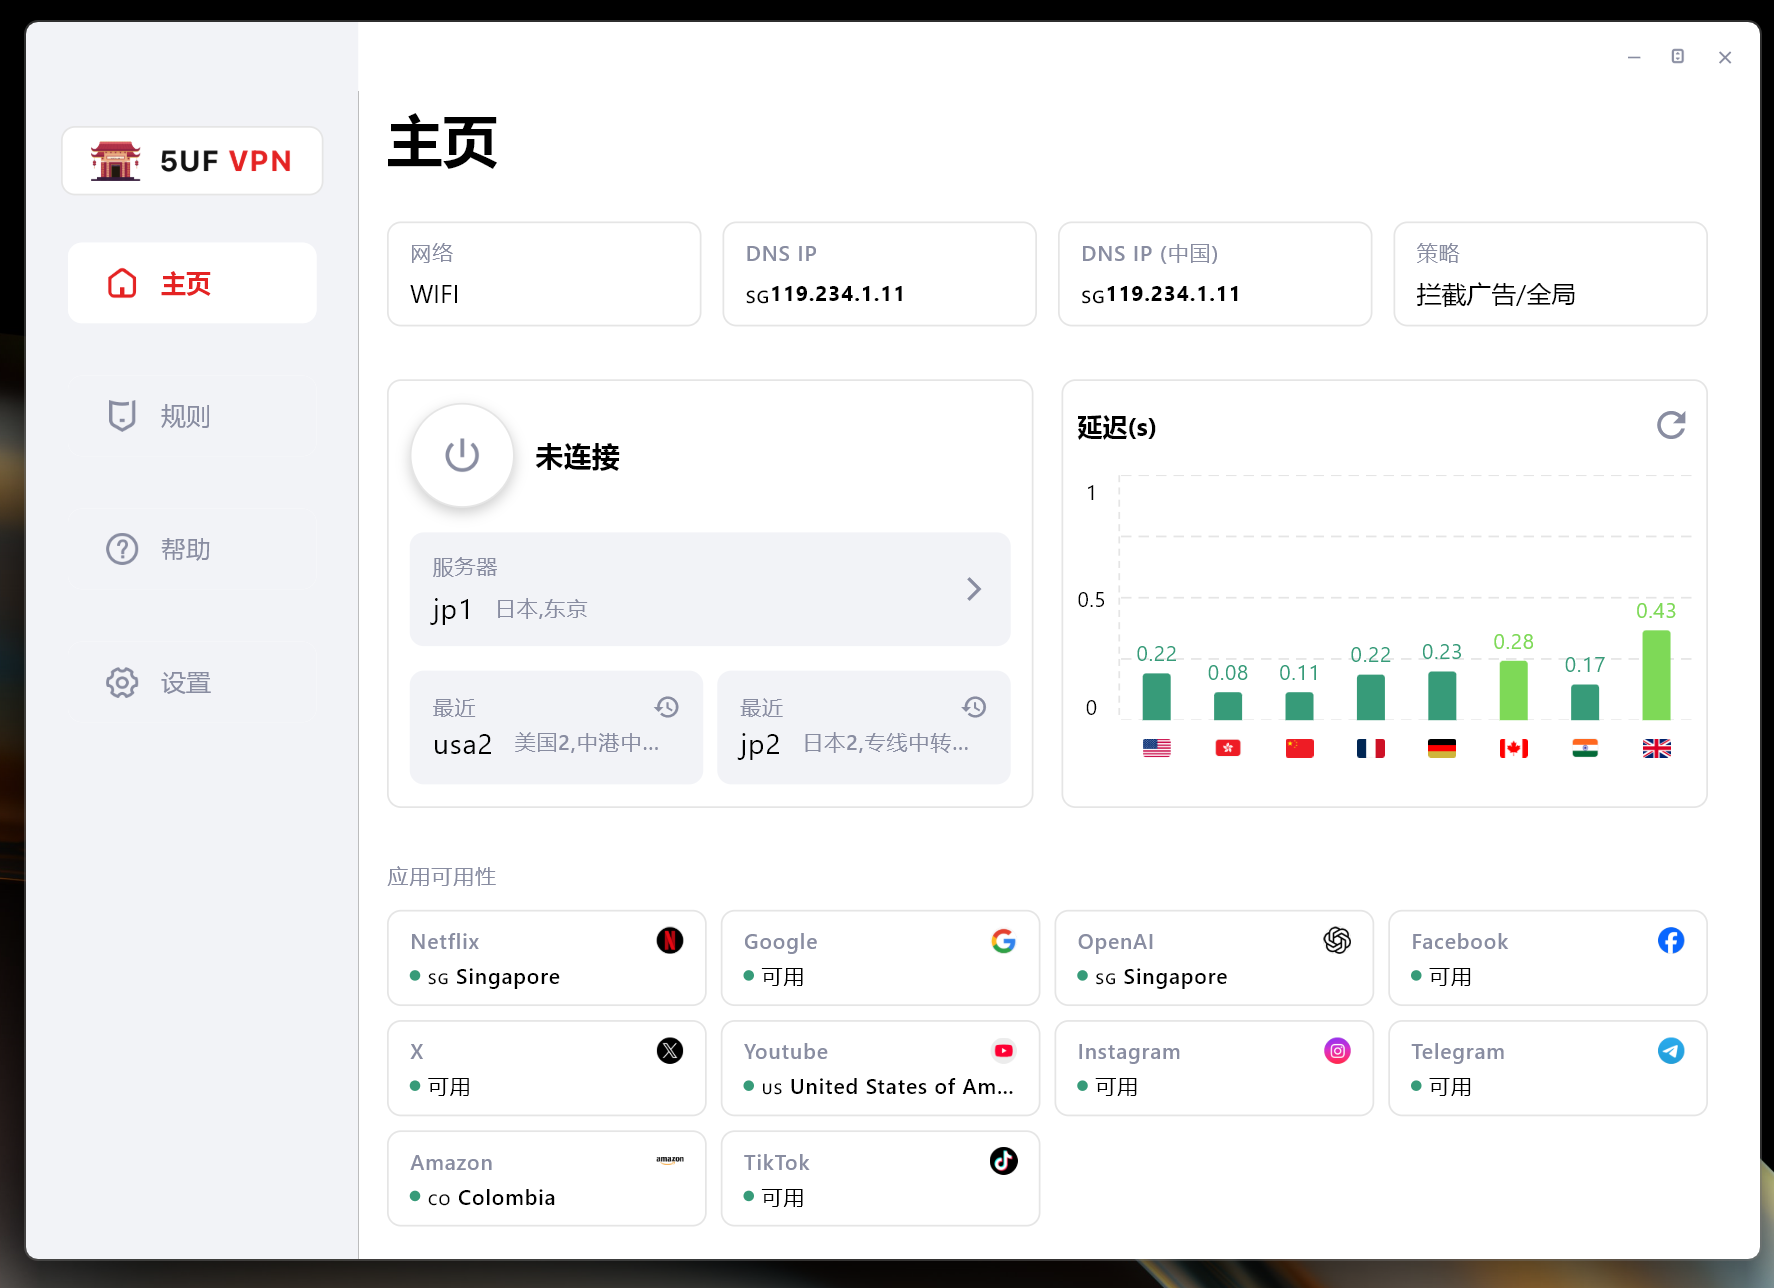
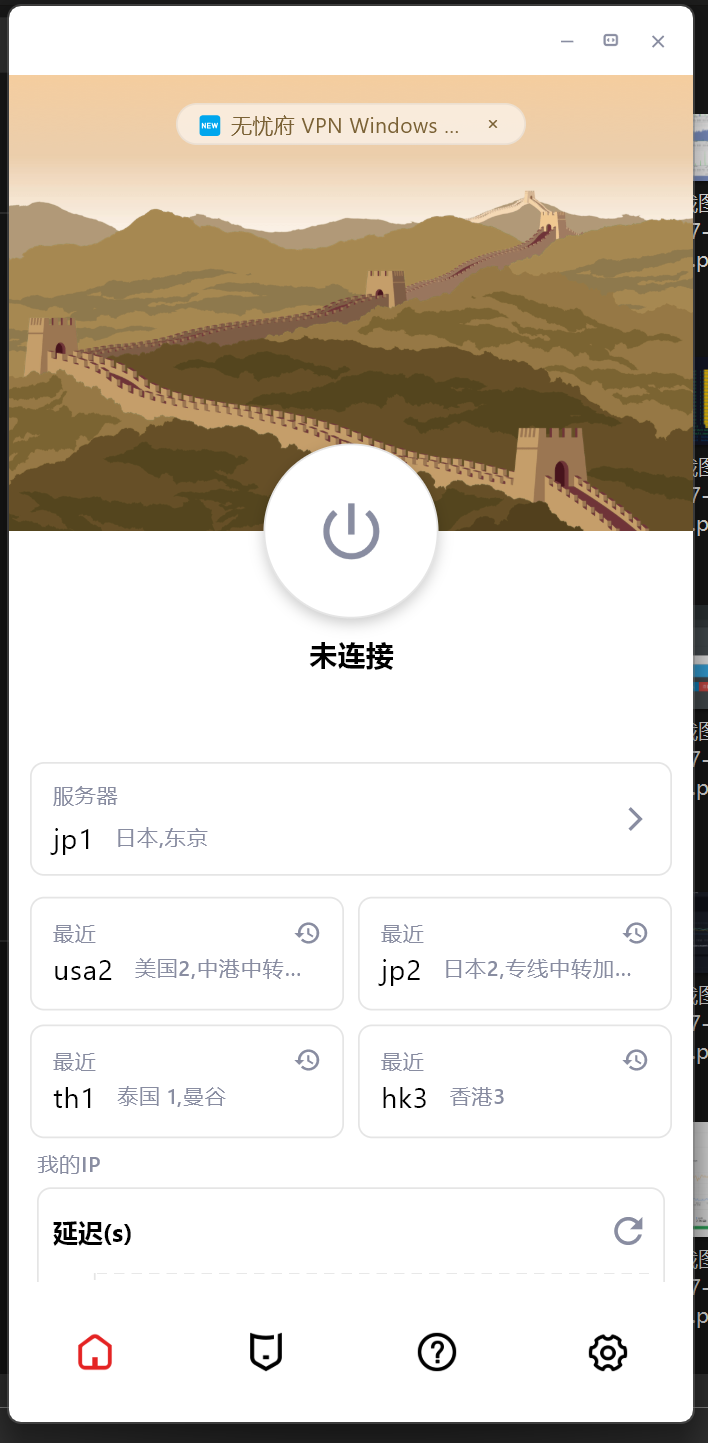
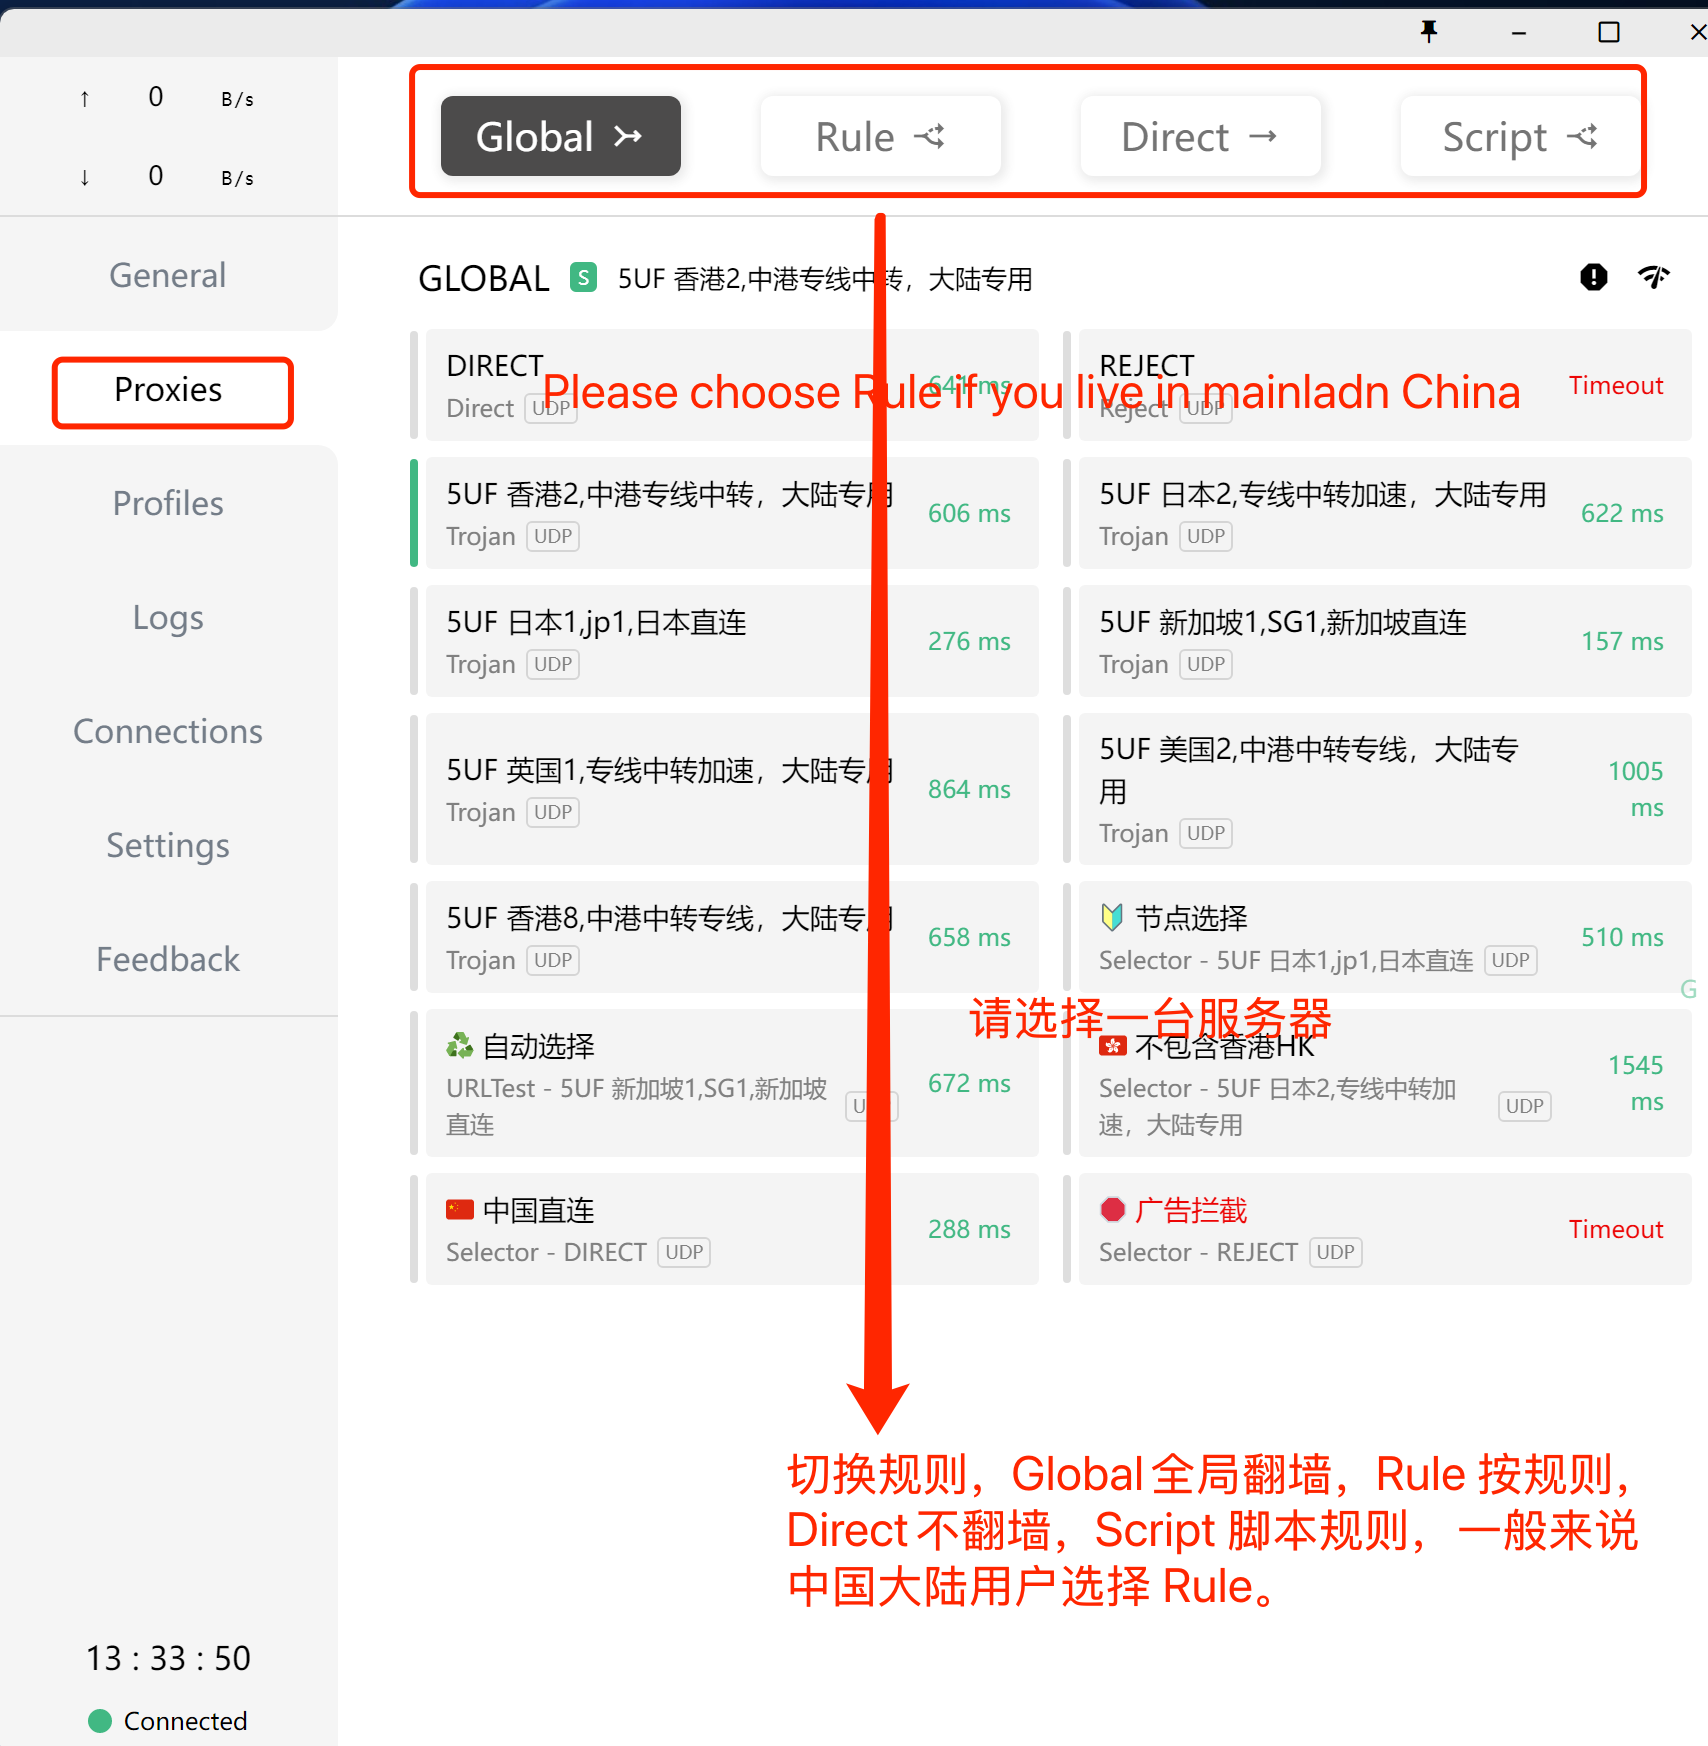
3. 使用
选择刚下载好的规则(如上图),选择好服务器(如下图),打开系统代理(下下图),开始使用。
打开系统代理,如下图:
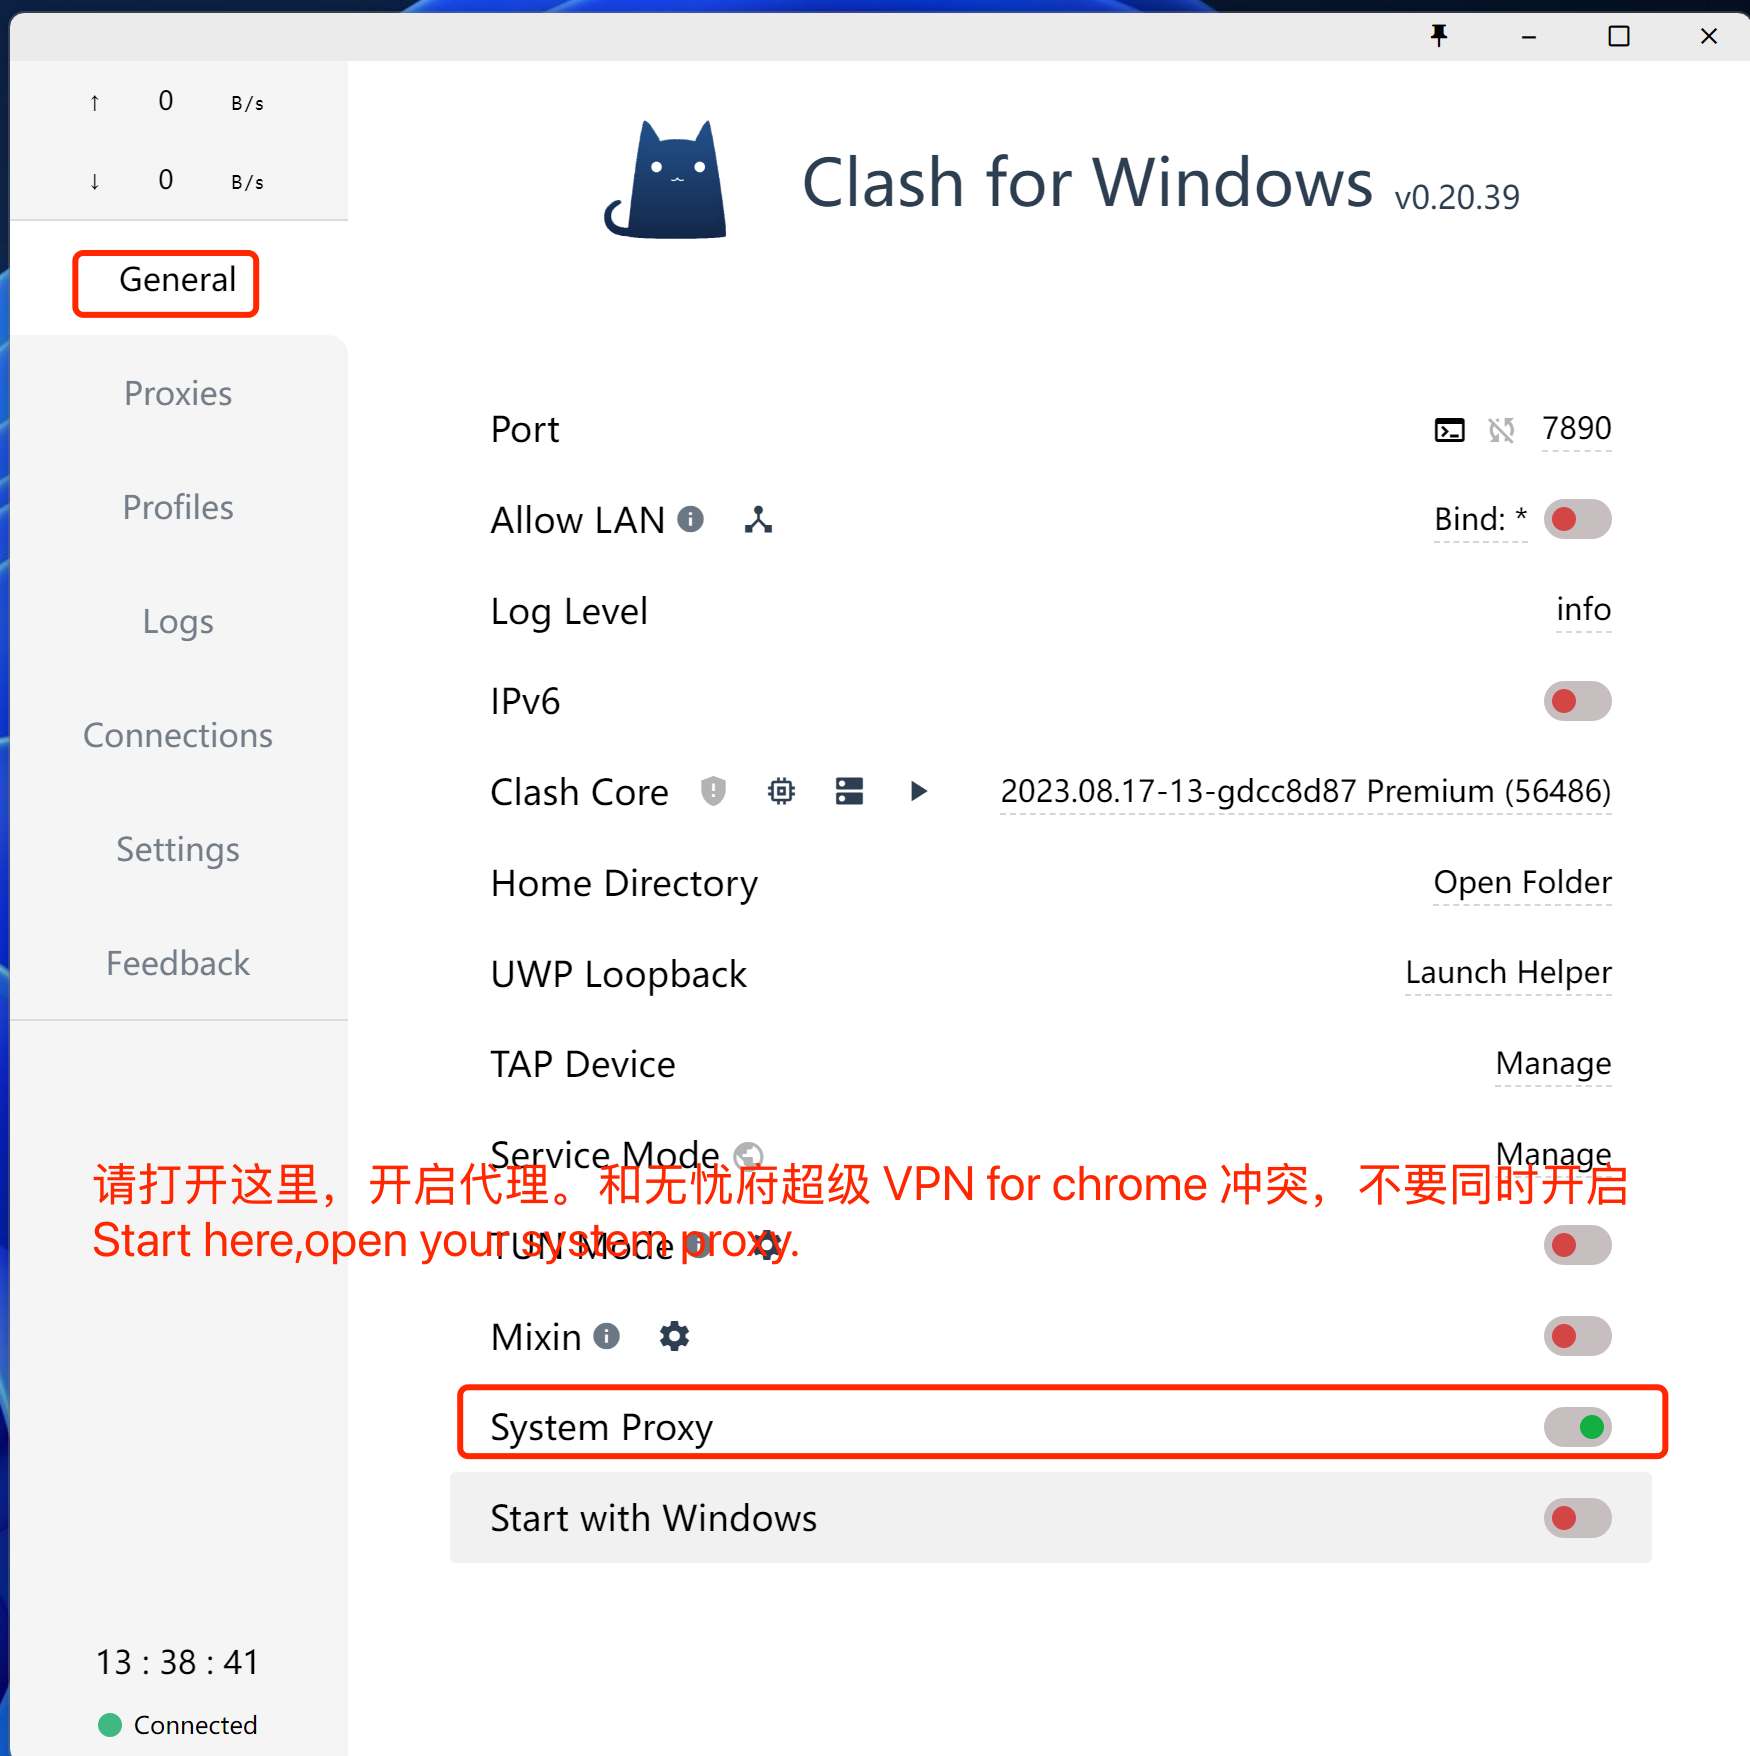
注意事项,如果你的浏览器同时使用无忧府超级 VPN for Chrome 插件时,这里的代理会失效,同理,其它代理类的软件都不能同时生效,你要先禁用插件,或者换一个浏览器。
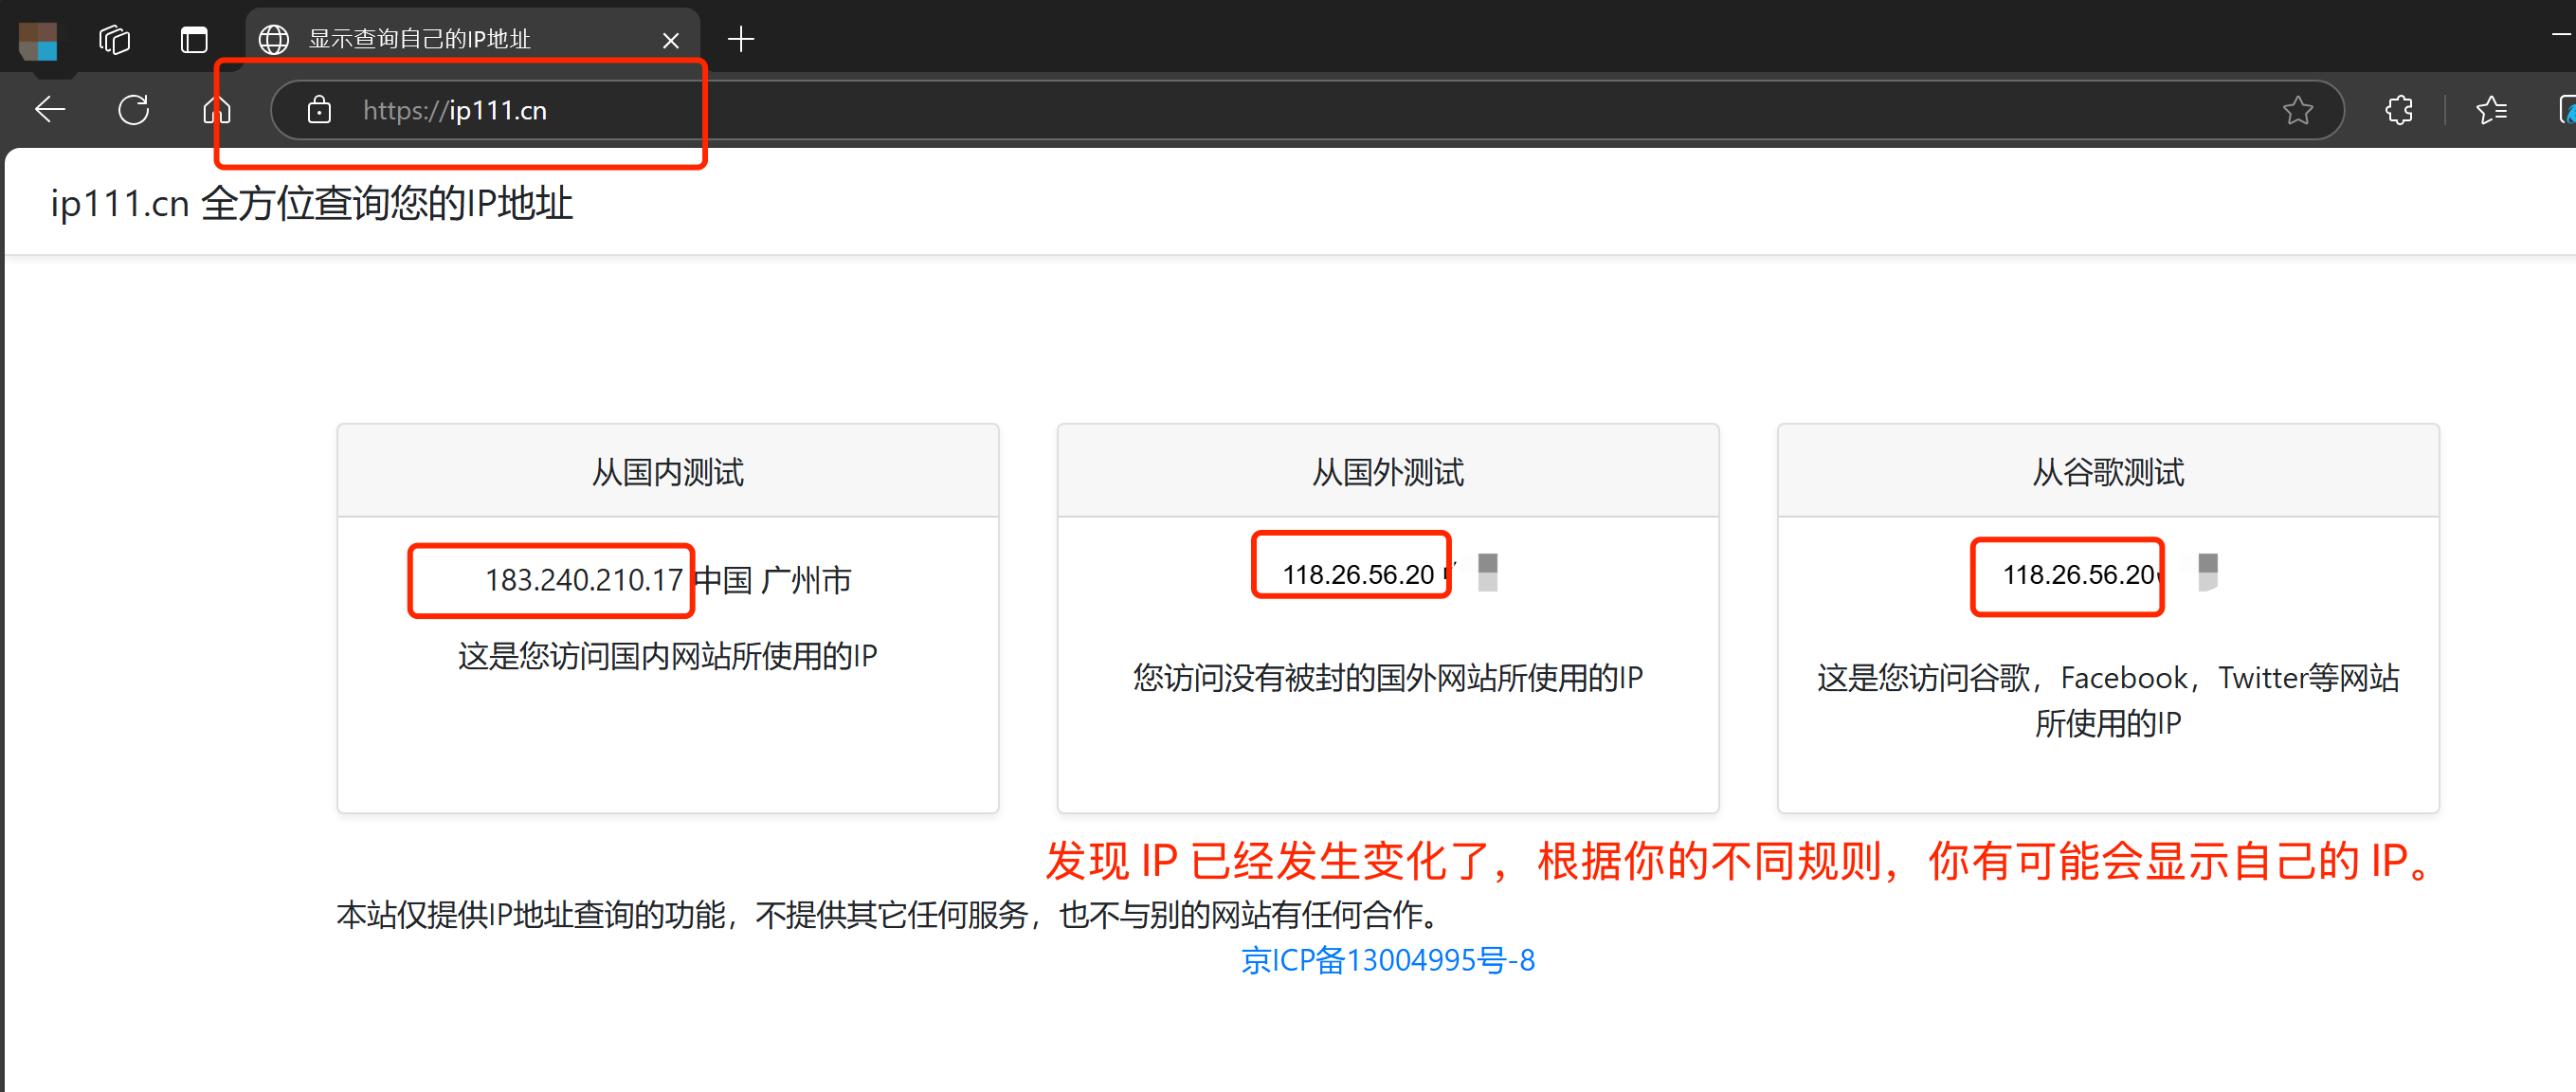
打开网址:https://ip111.cn